Wednesday, May 26, 2010
You say cheap like it's a bad thing...

Tuesday, May 25, 2010
Beauty lies in the details
The minute that I brought home my beautiful craigslist find, I knew I had to add to it just a little bit - give it that sense of uniquely mine and all. The easiest and nicest thing to do was to add some color to the bottom of these drawers. My initial props have to go out to THIS POST for the inspiration.
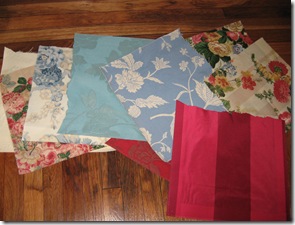
I was looking for wallpaper or scrapbook paper to line the drawers with when I went into the hardware store – just to see if they had any pre-fabricated shelf lining that I loved even more (which I didn’t expect to be the case). I was just about to walk out when the sales guy told me to come over and look at what they were about to throw out. He had 4 HUGE books of fabric swatches that they were going to toss because they were discontinued and he wanted to know if I’d want to cut out the fabrics I liked before they did it. Needless to say, I praise this hardware store and gentleman now because it was perfect for what I wanted to do!
So my combination of fabric swatches:
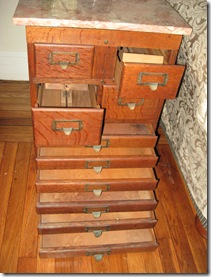
And my empty drawers + a roll of scotch tape:
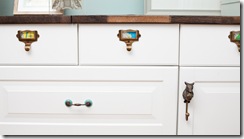
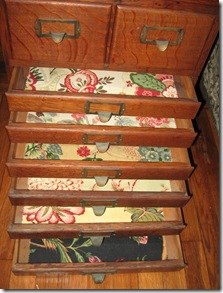
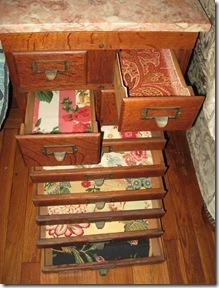 Isn’t it darling! All I did was roll some scotch tape like you do to hang posters and tape the fabric down to the wood. You can use double sided tape or something a little stronger if you want, especially if you're going to be taking items in and out all of the time, but for me this is the perfect and seasonally temporary solution! The bottom drawers didn’t even require any cutting!
And on the top drawers I got a little more creative with my felt fabric:
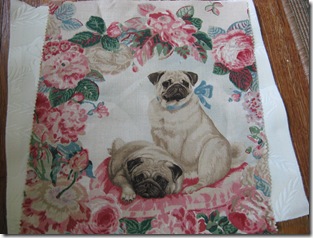
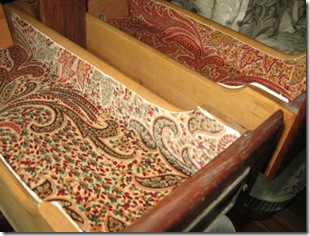 I’m so pleased with it and it cost me a total of $0.00! Plus I have tons of leftover fabric swatches that I can use later, like this little gem:
Horrah for simple touches!
Tuesday, May 18, 2010
I love salvaging
I’ve always loved going to Goodwill or Salvation Army, but now that I’m on my own and a salvation army is on the walk to my local grocery store, my love (and wallet) knows no bounds.
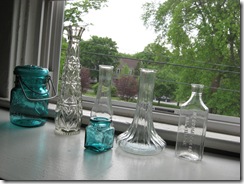
Now that I have natural light, I want to start filling my apartment with flowers and plants. This is easier said than done because I do not have a green thumb and I've been timid in buying any yet. I am growing herbs, so maybe this will instill some confidence in me - if they survive. Until I get some courage though, I've been collecting a small number of bottles/vases that I will be, one day soon, hopefully filling with flowers for my bedroom.
Isn’t the blue glass beautiful? I found that on my last trip and couldn’t pass it up.
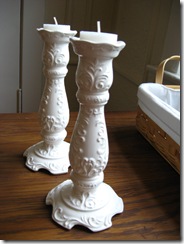
On my very first trip to the local Sal Vo, when I still maintained some sense of self-control in this store, I’m pretty sure these are the candle sticks that broke all of thatl.
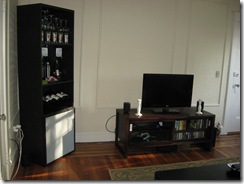
Don’t they just scream Anthropologie? They were a whopping $4 and just needed a little love. They were spotted with a greenish-gunk but with a little bit of soap and scratching, it immediately came off. I have then framing my television, as you can see below.
And now my absolute favorite find ever! This actually came from craigslist where I ended up driving 45 minutes to some guy’s house (I brought someone with me, of course) that had a coffin on the front porch (a leftover halloween decoration, I hoped) and a confederate flag wafting in the breeze. Needless to say, this was worth it.
Isn’t it great! He threw in the marble top and that cute little lantern to sweeten the deal – I have to say this was a steal. More than I’d pay for a regular side table at iKea, but you can’t pass up a piece of library card catalog history.
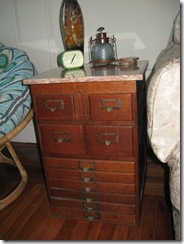 Here’s a close up on the lantern:
 The drawers all slide out. I really want to get some cute fabrics to line each drawer with.
And I just found this great piece of inspiration this morning on a blog that I think would also look great:
I like the look of the white with the maps, so I’ll either do maps or just find some really cute scrapbooking paper.
Oh how I love thrifting!
Monday, May 17, 2010
My eastern European kitchen
This weekend I was happy to finally buy plates for my new place. I went with the classic white with a rounded-off square design (I believe it’s called quatro). I like a white plate for serving food, but as for everything else I love some color.
I think that’s why I’m so drawn to polish pottery and immediately wanted to decorate my kitchen with my small collection of Russian (ie Matryoshka) dolls.
It started when someone bought me this set of DIY Russian dolls.
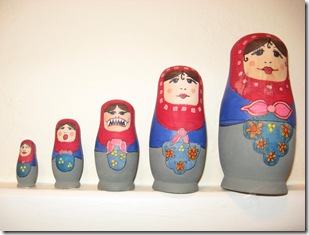
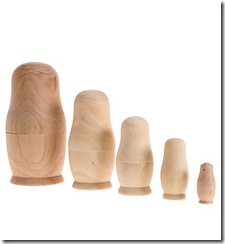 It was pretty daunting, but one day I took to the task and created these:
I think they turned out pretty cute; especially the middle one with fangs and the scared one next to it. I love putting a twist on things. I placed these on the shelf over my kitchen table.
I paired these with these adorable houseware items – the salt and pepper shakers are from Anthropologie and the measuring cups are from Urban Outfitter (and are still available online!).

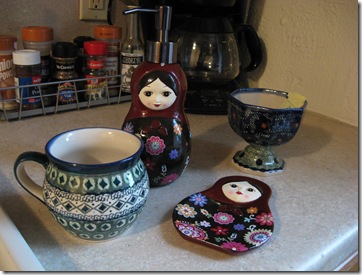
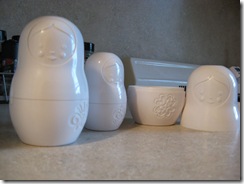 My mom also found me a russian doll soap dispenser and spoon rest (yes, it’s an obsession). And my aunt gave me these great little pieces of polish pottery.
Don’t you just love that mug! I haven’t purchased any bowls yet because I really want to get some fun design like this to pair with my white dinner and appetizer plates. This weekend I actually found a polish pottery vase at Salvation Army, so my dream is to find a great set of bowls. But maybe I’ll just end up splurging on those anyway – or see what Anthropologie has and end up buying those instead. I’ll have to wait and see.
Wednesday, May 12, 2010
My green bedroom
Moving into this apartment, I had a lot of ideas for my living room. I knew what I wanted to purchase, knew where the furniture needed to be placed, and re-arranged it rather quickly and much to my satisfaction.
But the bedroom...is a different story. I have little closet space, so a wardrobe and dresser was necessary. Plus, I have a slim dresser that matches my malm bed so I had to keep that. As of right now, I have a black bed and dresser on one wall, a very light maple wood wardrobe on the wall adjacent to that and a cherry dresser in the opposite corner. If I had the motivation, I would stain at least the dresser, but frankly that's a lot of work and in an enclosed space.
So my best bet is decorate! And I need some opinions.
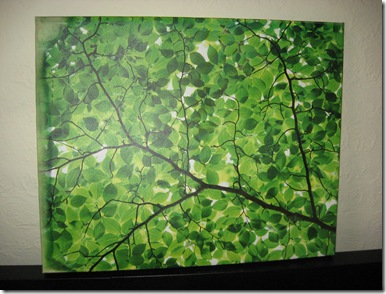
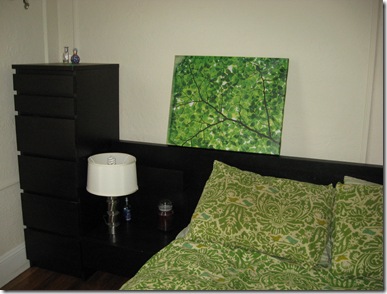
I scored this great piece of wall art at Urban Outfitters yesterday.
As you can see, the left side of it has some water damage (from the Rhode Island Flood of 2010) which made this normally $40-50 print a whole $5!
My plan, as of right now, is to hang it over this awkward space where my bed is. I say awkward because there’s a window over part of my bed (as you can see HERE) so my desire to have something placed centered over my bed is impossible. I think I’m going to hang it over to the side as you can sort of see below:
I just love the look of that bright green and the black. It’s so springy! And I was thinking, why not add some additional tree prints to make a kind of leafy collage of sorts. What do you think?
I have an idea for the other wall which is completely bare that may or may not involve a floral print and a moose head, so the new theme for the bedroom will probably be natureish.
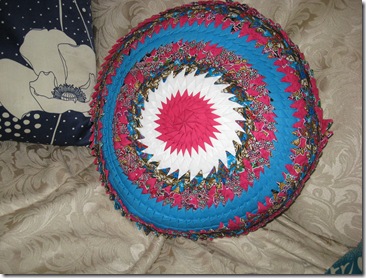
Also, I’ll share my other Urban Outfitter deals because they’re so cute. I got this great pillow which I loved when it was on sale for $20, and they cut it down to $10. Have you looked at the price of pillows lately? I’m dumbfounded, I can’t wait to have a sewing machine because some of these prices are crazy! But $10 I’m willing to pay.
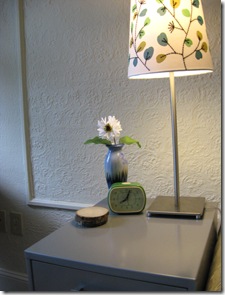
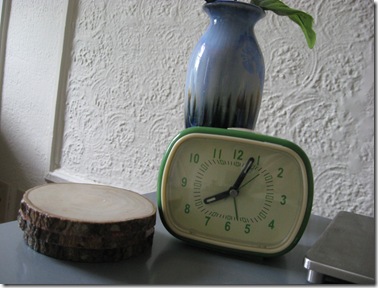
And I got this adorable clock for my living room. I tried to make one which I might share later, but I can’t figure out how to make the hour hand rotate properly…hm. But I do love this one and it looks great with the tree coasters that I also purchased at UO a few weeks ago.
I do love my living room. Let’s hope the bedroom is able to come together just as nicely.
Monday, May 3, 2010
first DIY of my apartment!


![Picture 160[5] Picture 160[5]](http://lh3.ggpht.com/_aQV_gmF_lwc/S_KifK00BpI/AAAAAAAAAGw/3HT6KwEDbMg/Picture%20160%5B5%5D%5B3%5D.jpg?imgmax=800)

